Set up your domain name
The platform in this instruction is GitLab, and I will demonstrate the domain name registrar with Namecheap.
Steps
Purchase a domain name on Namecheap
- Go to the official website to purchase a domain name what you like.
Register the name domain name on Gitlab
- Go to your repository, and choose the Page option in the Setting area. And then click the New Domain.
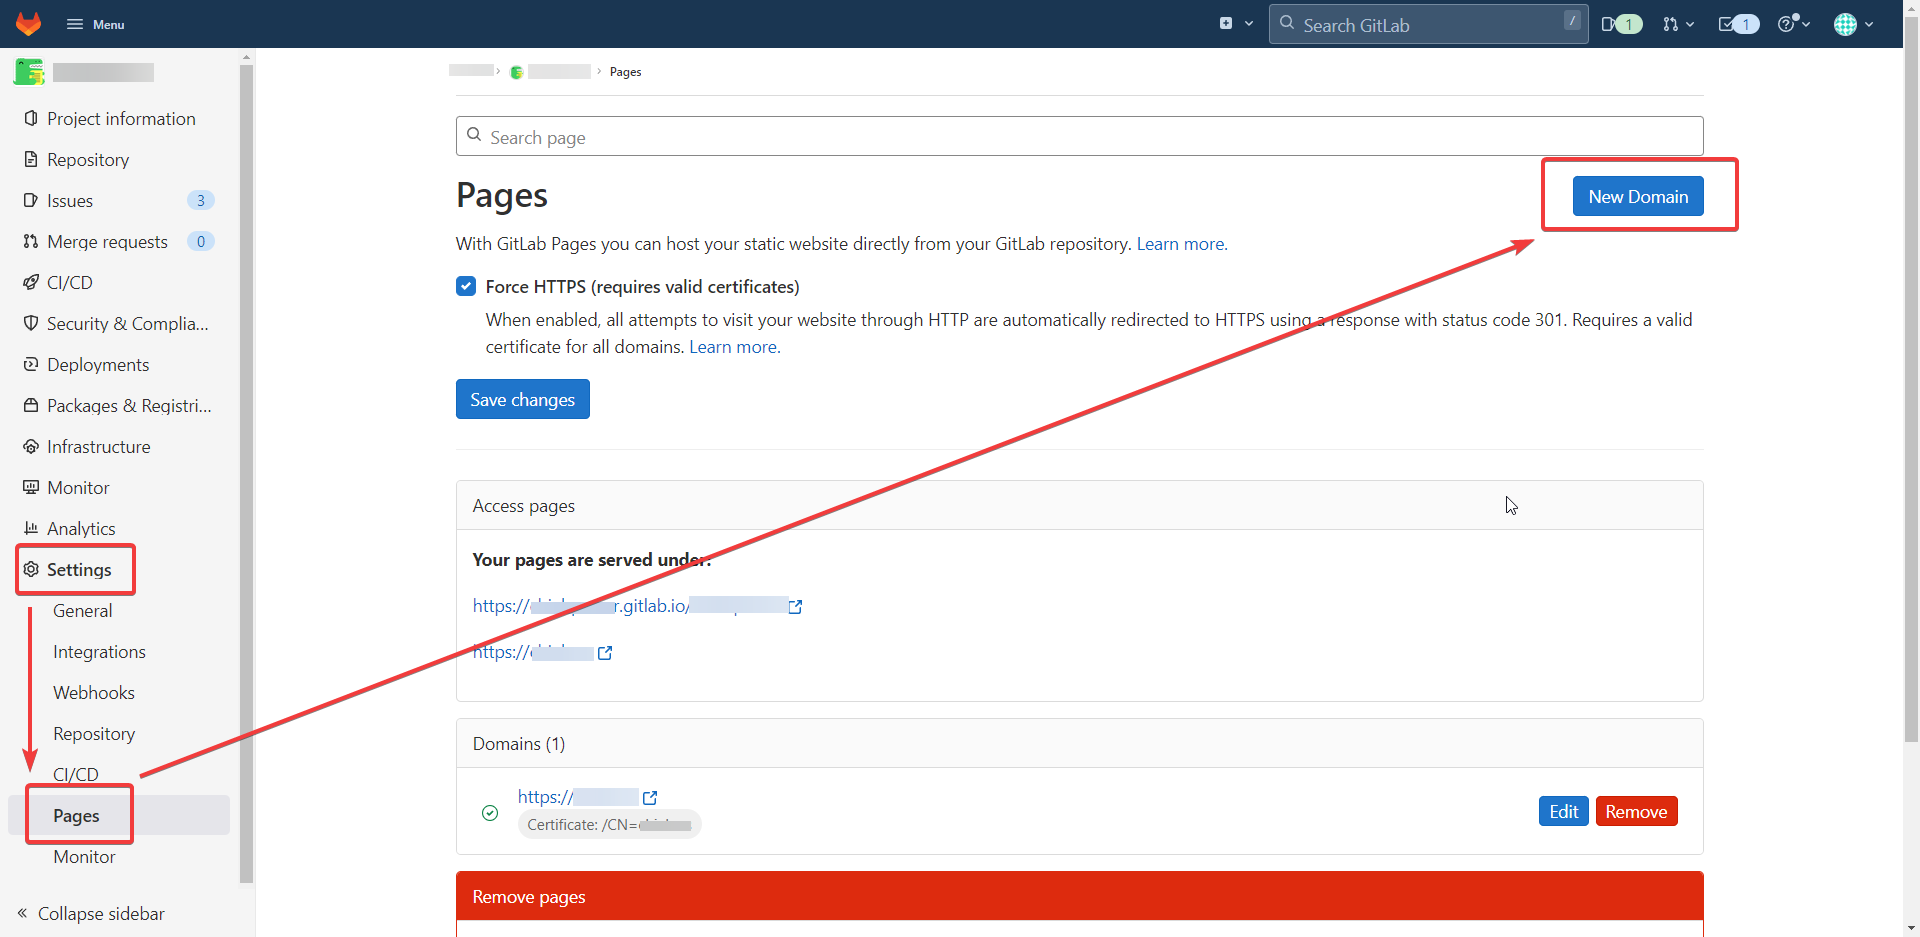
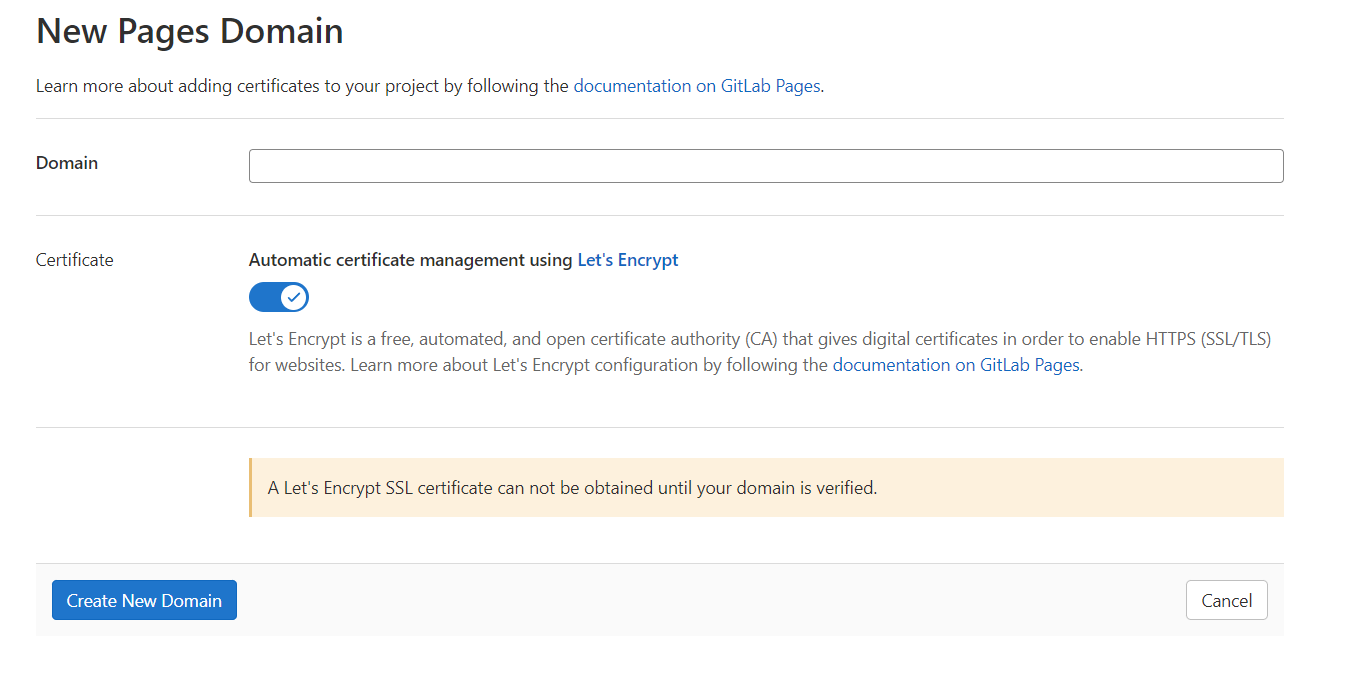
- Type your new domain new. If you do not have your SSL certificate, then we can let Gitlab help us to apply automatically.
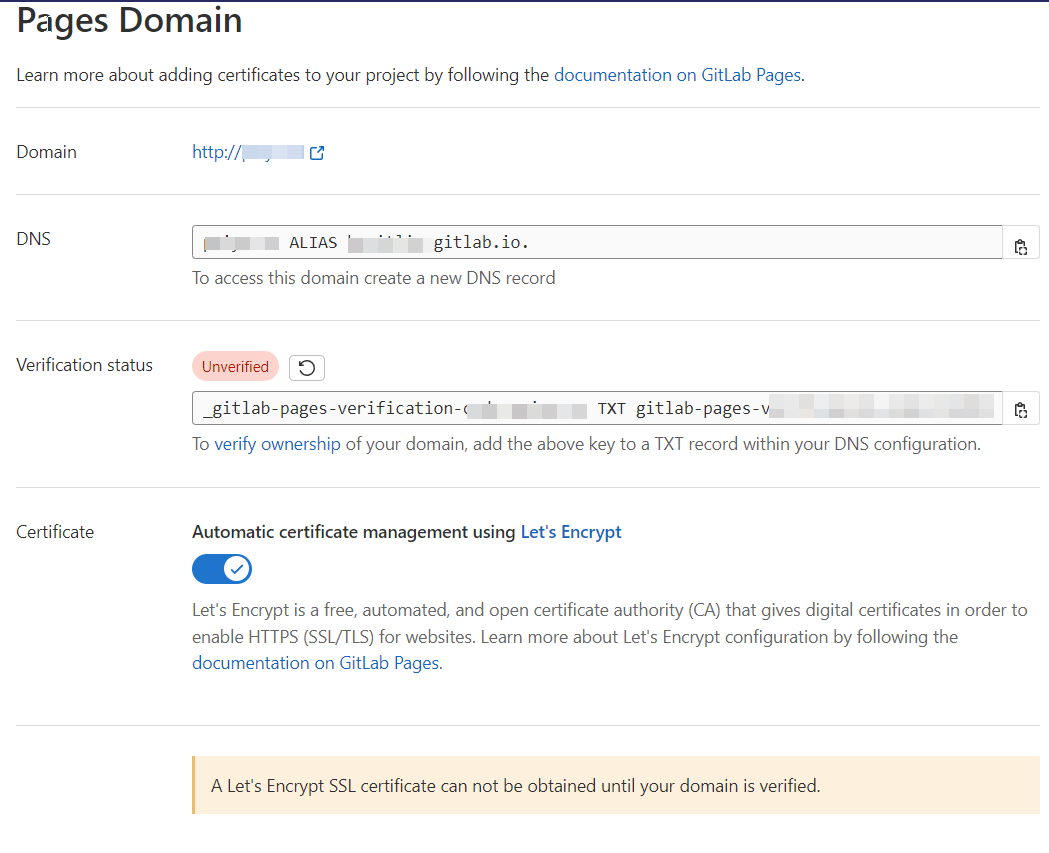
- Gitlab will give you a number (Verification status) to verify this new domain name. We will use it on the setting page of our domain registrar (Namecheap).
- Go to your repository, and choose the Page option in the Setting area. And then click the New Domain.
Verify the name domain on Namecheap
Let's go to the management area of your domain name. We choose "Advanced DNS"
We need to add a TXT Record to verify the status.
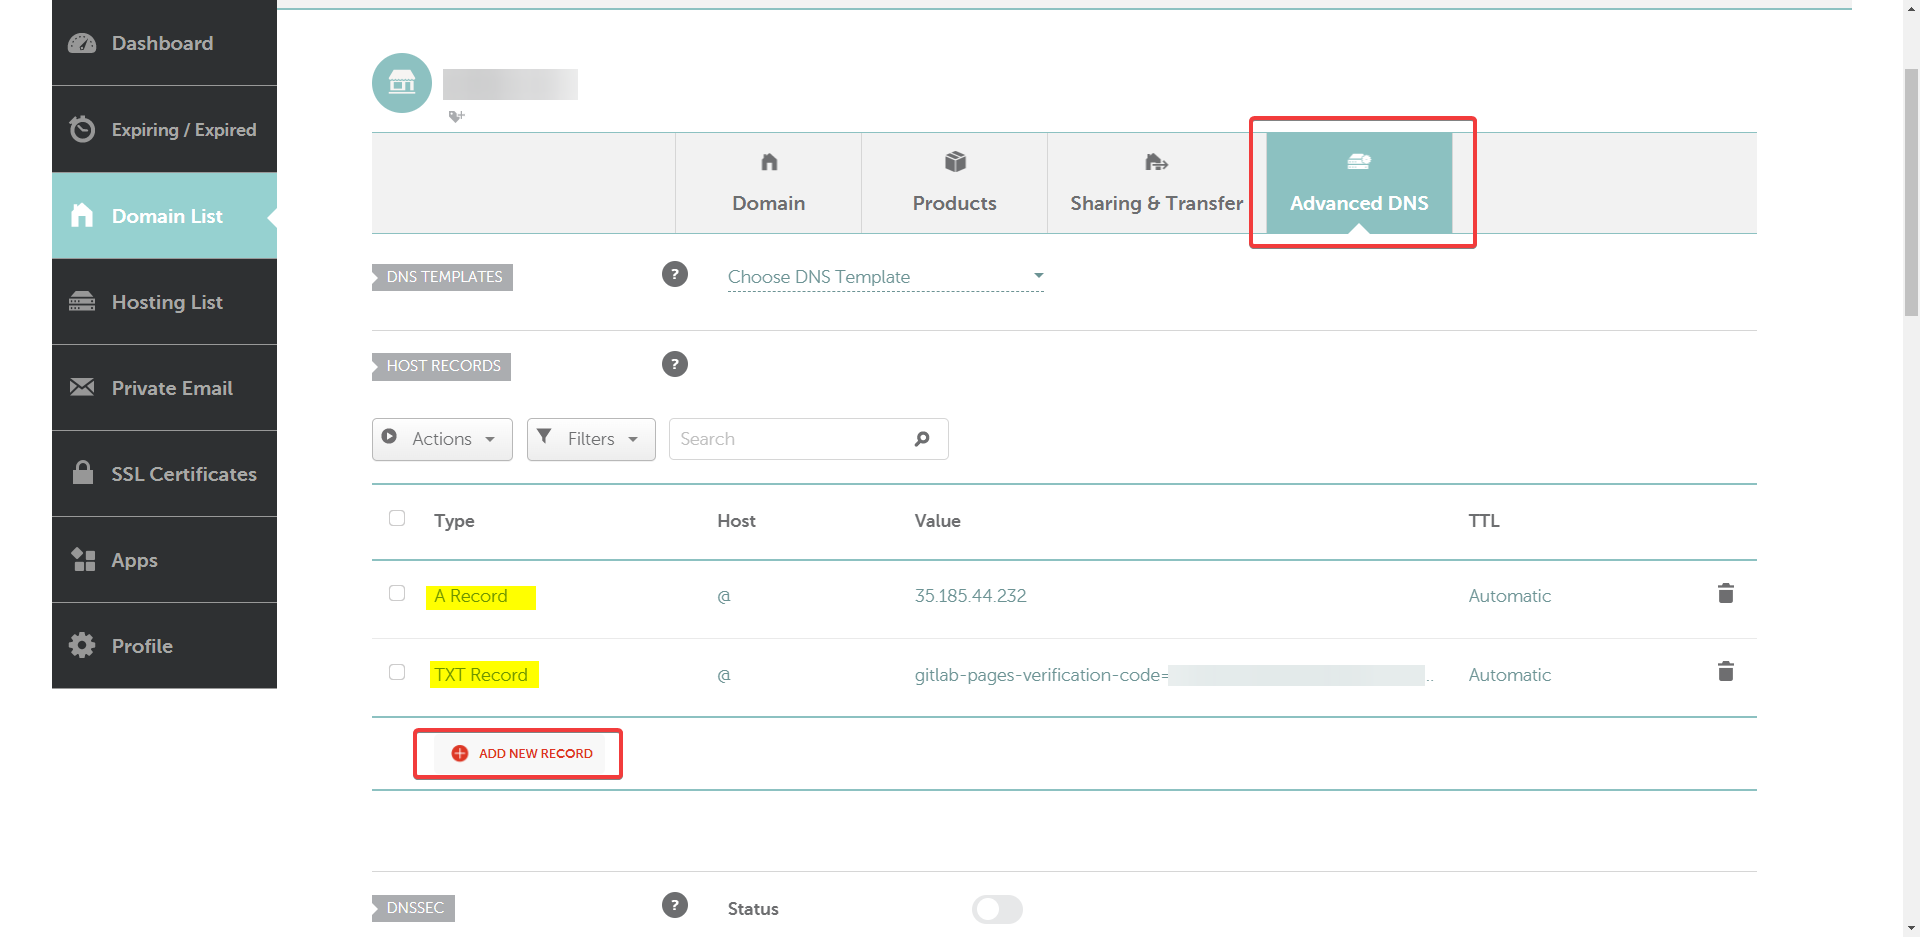 We can get the number from the Verification status of last step.
 For example:
_gitlab-pages-verification-code.test.com TXT gitlab-pages-verification-code=04971d8ba6e33653bc515164213We need to copy the words
gitlab-pages-verification-code=04971d8ba6e33653bc515164213in the Value place of the TXT Record. (You can check on my image.)We also need to add the Gitlab IP in Namecheap by
A Record. ChooseA Recordand the value is35.185.44.232. In this step, it is the same value if you are using Gitlab.Wait for a little bit. Go back to the page of Gitlab. Refresh the button until it shows Verified.
Amend the url and baseUrl in your code. We need to change the url in the
docusaurus.config.jsfile.docusaurus.config.jsmodule.exports = {
title: 'Chieh',
tagline: 'Code Once, Live Once.',
url: 'https://(your name domain name)',
baseUrl: '/',
In the beginning, you only have HTTP with your website because Gitlab is still in the stage of applying the SSL certificate. Hence, we just need to wait for a little bit, and then come back later.
You will notice that your website will be applied with HTTPS automatically soon.